Best Practice: How to quickly find your best schedule
The following represents best practices for using SLP Scheduler to quickly find your best schedule. There are many ways to make effective use of our service, but we recommend starting with the below workflow.
1. Start early
The first week of school is crazy. Ask any school-based SLP (or the spouse of one, in my case), and everyone concurs: utter and complete frenzy.
While we think that using artificial intelligence to help create SLP schedules is pretty cool, it's not instantaneous. It's math, not magic. Starting the process early will help prevent any last-minute emergencies the night before your schedule is due.
2. Read through the caseload editor
Even before you have your full caseload, start by creating a "New Caseload" on the SLP Scheduler site. Take a look around, and see what options exist. Knowing what features you have available will help you know what to ask when soliciting information from classroom teachers.
3. Enter what you know beforehand
Even before you have your full caseload, you can start filling in basics about your caseload: Start/end dates for school year, your personal schedule, your scheduling preferences, etc.
Please recognize that day names must be spelled consistently throughout your entire caseload. If a day name is abbreviated in one place, the same abbreviation must be used everywhere. Unless you have a good reason otherwise, it's best to stick with the default 'Mon-Fri' Student Rotation, which contains the default day names (Mon, Tue, Wed, Thu, Fri).
When setting your therapist preferences, please note that it helps the scheduler to keep as wide of a lunchtime window as reasonably possible.
You should not manually reserve time for the therapist lunchtime, billing, evaluations, etc. The scheduler will automatically make space for these things, and you can fill them in after all of the students are scheduled.
Please also recognize that setting a maximum group size should be set to your state's legal maximum. If you want, the scheduler will still try to minimize your group sizes. However, the scheduler needs to know the difference between your preference and the legal maximum.
Be sure to click the giant green "Save" button when you're done.
If the "Save" button is grayed out, then you have validation errors in your caseload. Your caseload cannot be saved until all validation errors have been fixed. Look for validation errors throughout the form in red text. (You might have to click through each of the top tabs, list of therapists, or list of students to see the red text.) If you're having trouble locating the error, a full list of errors can be found at the very bottom of the page. To let the system know that you made a correction, move your cursor to another location and click "Save".
4. Solicit student information from classroom teachers
Some argue this is the most painful part of the process. Now that you know what to ask, gather all of the student information that you'll need to fully enter your caseload data. If you're doing it over email, consider using a template, where you copy/paste a list of information that you need for every student.
Enter building-wide, grade-wide, and classroom-wide schedules under the "Schedules" tab of the caseload editor. This is where to add student lunches, recess, and specials.
The "Student Availability" section (under the "Students" tab) should only be used for scheduling details specific to one student. If the scheduling detail applies to a building, grade, or classroom, please follow the above instructions.
5. While waiting for teacher schedules, create a test caseload
Sometimes it takes a few days to hear back from all of the classroom teachers. In the meantime, go ahead and add a few test students to using the caseload editor. Adding only 2 or 3 students is all you need, and they can even be fictitious if you want. (Be sure to remove them later! It's hard to bill time for fictitious students. :)
Once you've added 2 or 3 students, click the giant green "Save" button. Click the green "Go" button next to your caseload, then click the giant green "Schedule" button to kick off the scheduler.
When the scheduling engine starts, it will attempt to create 5 candidate schedules for you.
6. Address any errors
If this is your first time using SLP Scheduler, you might see some errors pop up from the scheduling engine. Pay close attention. Often the errors are small (but important!) details, such as confusing AM with PM.
Make edits to your test caseload as necessary, until you see 5 candidate schedules generated for you, each with a status of "Success". The best-scoring schedules (according to your preferences) will appear that the top of the table.
Take a look at some of the generated schedules. Familiarize yourself with the different schedule formats.
7. Add the rest of your students
Four words: Save early, save often. Please.
In case of emergency, we can help you recover caseload data. However, we can only help you recover data that was once saved.
General tips:
- The Delivery Model should be left at 'Unspecified' unless specifically directed otherwise by the student's IEP.
- Don't "lock" yourself to a specific building unless required by your district. The engine will automatically optimize your travel based on the complexity of your caseload.
It might take some time to enter all of your students, but this effort is not in vain! Here are some benefits to adding your entire caseload:
- Giving the engine complete information helps it to make optimizations that humans are unlikely to think of
- Every successful run of the engine produces 5 candidate schedules for you to choose from
- Schedules generated by the engine optimize for productivity, which means that you'll reap the benefits of using SLP Scheduler week after week
- When next school year rolls around, your caseload data will still be here, ready to be adapted for any changes. You won't have to add the same student to your caseload twice.
8. Schedule!
After saving, click the green "Go" button next to your caseload, then click the giant green "Schedule!" button to kick off the scheduler.
When the scheduling engine starts, it will attempt to create 5 candidate schedules for you. Watch out for any immediate errors that the scheduling engine might give you. The most common errors arise from:
- Day names that are inconsistent in spelling or abbreviation
- Accidentally mixing up AM and PM for time ranges
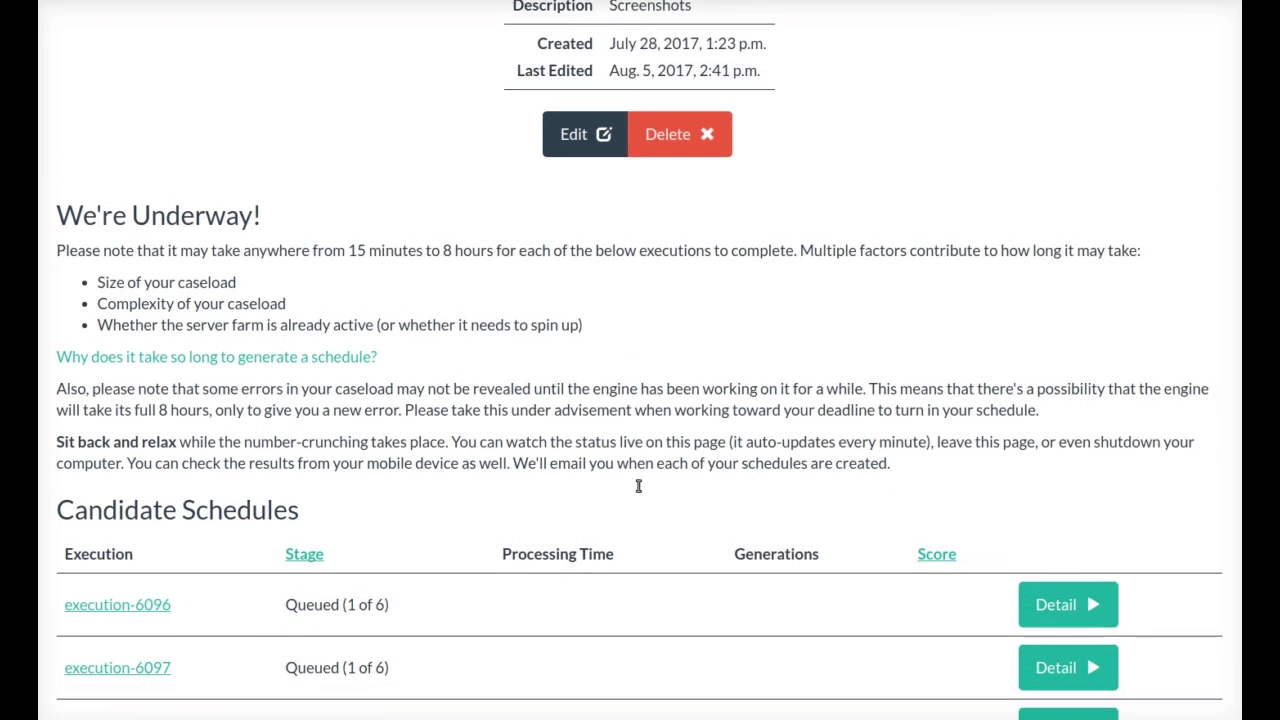
Now, sit back and relax while the number-crunching takes place. You can watch the status live on the page (it auto-updates every minute), leave the page, or even shutdown your computer. You can check on the status of the scheduling engine later from your mobile device or tablet.
The process of creating your schedules usually takes between 5 minutes and 1 hour (but never more than 8 hours). Why does it take so long to generate a schedule?
You'll know your candidate schedule was generated successfully when:
- You receive an email notification
- The "Stage" column on the caseload page shows a green "Success" status
- A new results button appears to the right of the green "Detail" button
9. Review generated schedules
The best-scoring schedules (according to your preferences) will appear that the top of the table. You're likely to like the better-scoring schedules best, so take a look at those first.
10. Rinse and repeat
If you're not happy with the results, consider whether adjusting your caseload Preferences would help. For example, if you don't like how some of the "Prefer Not" student availability entries weren't 100% followed, consider increasing the value for "Minimize Taking Students During Non-Preferred Times" in your caseload preferences. (You can also change them to "Must Not" entries.)
If only a handful of things are off, then consider "calling it good" and using your favorite generated schedule as the basis for your schedule this year. You can make any small changes by-hand to be sure everything is just right. For more options, see Can I manually edit a generated schedule? Or am I stuck with it?
Also, if you rinse and repeat too many times, never fear: Check out our satisfaction guarantee.
--
If you'd like to see how it all fits together, check out our Start-to-Finish Walk-Through:
Customer support service by UserEcho
